Ebikes are more effortless than regular bikes because the motor provides assistance through a pedal assist sensor or a throttle mode while riding. And it is possible only when all the ebike parts such as the motor, battery, sensors, and controller function properly.
The working of each and every part is important for an efficient ride on an ebike. I hope you know the purpose of an ebike battery, sensors, and motor.
But, Do you know the role of a controller in an ebike, what would happen if it stops working, and most importantly How do I know if my ebike controller is bad?
So stick to the end of this article as we are going to discuss:
- What a controller is and how it works?
- What are the factors and reasons that affect the controller to damage?
- How can you diagnose and repair common problems of an ebike controller? And some important FAQs.
| Follow Us on Google News Feed | Click Here |
| Follow Us on Our Facebook Page | Click Here |
| Follow Us on Our Twitter Page | Click Here |
What is an E-Bike Controller & How Does It Works?
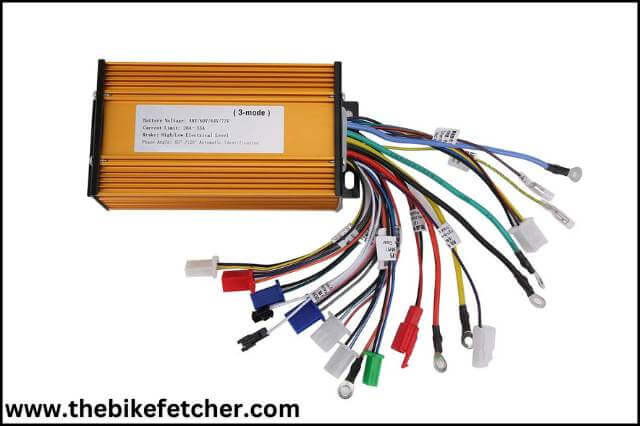
The controller is one of the most important parts of an e-bike as it connects all the parts and controls their functions properly. Ebike is nothing without a controller. Therefore, It is also known as the “brain of the e-bike”.
Technically, The controller is an electric circuit that is connected to all other e-bike components, such as the battery, motor, throttle, and display, and it controls the functions of all other components.
A controller includes main chips known as microcontrollers and other peripheral components such as sensors and resistors. Without a controller, your e-bike is nothing.
Role of a Controller in an Electric Bike
As you know the e-bike controller is responsible for controlling and managing the work of all other e-bike components, such as the motor, battery, throttle, sensor, pedal assist, and display. Here is a list of all functions that a controller performs in an ebike:
- The e-bike controller also controls and maintains the safety and protection of an electric bike. It takes power from the battery and transfers it to the motor, which works.
- The controller is responsible for turning on/off the motor and running the bike as it brings power from the battery to the motor and helps in running the bike.
- The controller also controls the ebike speed by restricting the maximum speed.
- The controller protects the bike if the current in the motor is too high by automatically shutting down the motor.
- It controls the brake and provides safety and protection to the rider while applying the brake by stopping the e-bike and shutting down the motor.
- It also protects the battery from high voltage by shutting down the motor if there is high voltage in the battery.
- The controller protects the transistor from high temperatures by keeping track of the FET temperature and shutting down the motor when the temperature is too high.
- The controller manages the function of all e-bike parts and gives them good performance.
- The controller protects the motor winding from overcurrent by reducing the flow of current.
I hope you have got the answer to why we consider the controller the brain of an ebike.
Related: Can You Charge an Electric Bike at a Tesla Charging Station?
What Causes the Malfunction of an Ebike Controller?
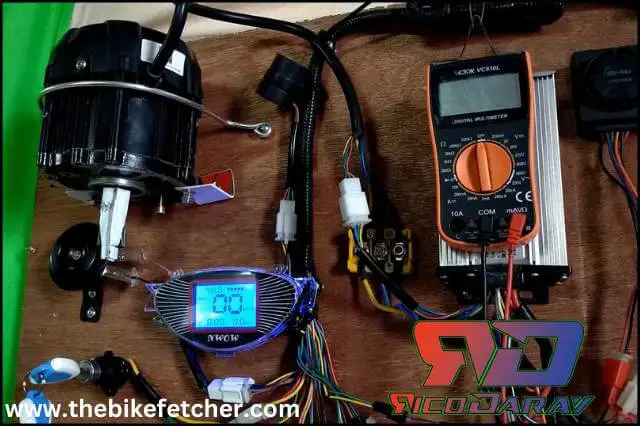
It is essential to properly care for an e-bike and its parts, including the controller. Because, as the quote says, “prevention is better than cure”. If you want to increase your riding experience and performance, you must learn about taking care of e-bikes.
There are so many factors that can cause the controller to malfunction. Poorly connected wires, inappropriate storage conditions, bad weather, extreme power losses, and damage to the internal power supply are the most common reasons that cause the controller to malfunction.
Here are the major causes of ebike controller problems:
1. Power Device Failure
The controller of an ebike is directly linked to the battery (power source). So there may be some disconnection in wiring, short circuits, and depletion due to motor overload leading to a power device (battery) to supply the current to the controller.
Latest news: E-Bike Buyers Have Been Warned About the Fire Risk
2. Failure in Controller’s Internal Power
As you know the controller manages the all functions of an ebike appropriately. But sometimes due to motor overload or any technical reason, its internal wiring may break due to a short circuit and stops supplying output power.
3. Environmental Factors Affecting a Controller’s Work
Is it possible for e-bike controllers to be affected by temperature? YES! A drift or overheating machinery will cause it to not work properly. It’s easy to recognize the controller’s heating problem as you can feel it by touching it.
So, protect the controller from extreme temperatures and keep an eye on every part and how it’s functioning.
Always remember: Don’t ride the bike if you find any of the above issues and make sure you get them fixed as soon as possible.
Otherwise, things will be worse, you will have to pay more for maintenance.
There may be some other reasons for the ebike controller not working that are not mentioned above. I have experienced all three of the causes above.
Related: Riding an Electric Bike for the First Time: Ebike Riding Tips for Beginners
How do I Know if My eBike Controller is Bad or Working? (How to Test)
If any part of your ebike is not working then the very first step you need to do is check the controller because most of the time your bike’s parts malfunction due to the controller’s fault.
Troubleshooting an e-bike simply means the systematic way you solve any problem related to your e-bike and its parts on your own. Troubleshooting saves time as well as money. Sometimes you can simply check and solve the e-bike problem and fix it if it could be done at home.
Here is how you can check your e-bike controller at home by simply using an e-bike tester and a multimeter.
1. Check by Using an E-bike Tester
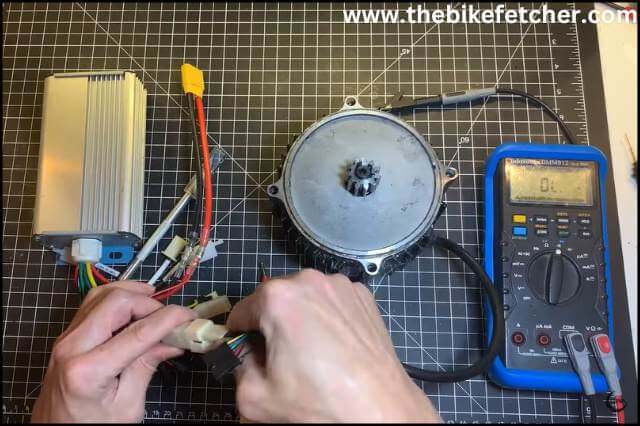
An e-bike tester is a great option to check the parts of e-bikes. As the name implies, an e-bike tester can be used to check all parts of an e-bike, including the controller.
Here is how you can use an e-bike tester and check the controller:
Step 1: Remove the controller from the ebike so that you can check it.
Step 2: Connect the throttle to the controller and disconnect it from the bike.
Step 3: Connect the controller and the e-bike tester to test.
Step 4: Turn on the tester and throttle and observe the controller’s signal.
Step 5: If the tester is flashing a complete light, it means it is working.
Apply the same process with other parts using the tester and controller.
2. Check by Using a Multimeter
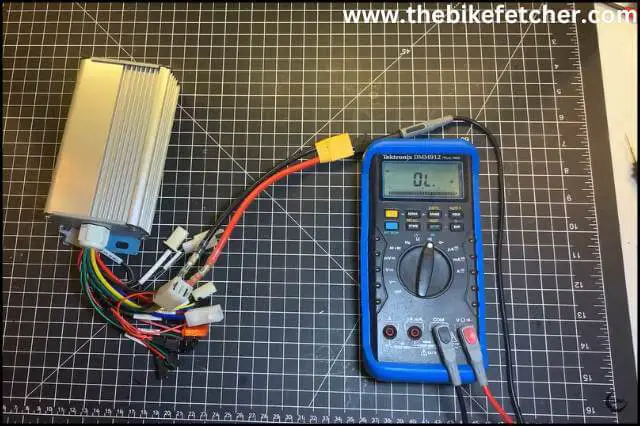
Using a multimeter to check the ebike and its parts is a technical and slightly complicated process. A multimeter is an instrument that can be used to check the electric current, resistance, and voltage.
Here is how you can use it to check the controller:
Step 1: Connect the battery and controller to check.
Step 2: Set the multimeter reading to continuity to check the resistance and voltage.
Step 3: To check for resistance, set the multimeter accordingly and connect the negative terminal with the multimeter cable.
Step 4: Observe and read the digits displayed on the multimeter.
Step 5: If the reading is below or lower than 8 kilohms, it means there is damage to or a problem with the controller.
How to Fix Common Ebike Controller Problems
Not all e-bike problems require a mechanic shop; some problems are so easy that you can fix them yourself at home. It is better to do proper maintenance on an e-bike to avoid any problems. Make sure to read this e bike controller troubleshooting guide:
1. Choose the Controller According to the E-bike Design
It is always better to invest in good-quality controllers than in low-quality ones. An e-bike controller is a very essential part of the bike. It is advisable to go for a branded, standard-quality controller to make your e-bike last longer.
You can choose a good quality controller by researching and studying different controllers. Make sure the cables used for corner cutting are thick because thick cables are capable of withstanding heat and preventing short circuits. Bulky radiator controllers are better than lighter controllers.
2. Testing the Current Control
If your electric bike controller is not working then you can test it by testing the current control. As the controller controls and manages all activity on the e-bike, it is very important to have a controller with good current conductivity.
The controller’s ability to regulate the current is important for better performance.
You can check the current by connecting the battery so it can work. And then select the short-circuit line of output. If the internal resistance is low, then the controller has good current handling ability.
3. Make Sure to Check the Heat Acceleration
Heat acceleration determines the controller’s effectiveness. To check the acceleration of the controller, you need two controllers to compare.
Break both controllers and hold the radiator to check the controller’s speed. Hold the brake for 5–10 seconds and leave; repeat this a few times to better understand heat acceleration.
A suitable controller should be cooler after testing. Compare both controller temperatures, and the one with lower temperatures is better. After testing, make sure to tighten the screw to avoid any kind of damage.
4. Observe the Wire Connection
Make sure to check that all the wires are connected tightly and securely. All wires should be connected to the correct outlet. Check all the wires. If they are burned, it means there is a problem and you need to replace them.
Wires can loosen up due to wear and tear; fix that. You must check the motor and throttle to ensure that there is a problem with these parts. Make sure that the throttle is working at the bike’s speed. Check the power switch and its fuse to see if they are burned; replace them.
Conclusion: Ebike Controller Problems Fixed
As you know the controller is one of the most crucial parts of an e-bike, so it is very essential to take care of it. The controller functions just like a human brain. If the e-bike controller is not working, it may be because of poor wire connections, power device damage, or environmental damage.
How do I know if my ebike controller is working? If the controller has a minor problem, you can test it using an electric vehicle tester and multimeter; repair it at home. But if there is any major problem, you need a professional technician to repair the controller or replace it (if required).
Video on Electric Bike Controller Problems: How To Identify And Fix Them
FAQs: Electric Bike Controller Problems Fixed
Q1. What causes ebike controller failure?
Electric Bike controllers might fail due to so many reasons but power device failure, Internal server failure, connection loss with the connector or high temperature. That is why ebike controllers go bad or do not work properly.
Q2. Can I change ebike controller?
Yes, changing the ebike controller is not a big deal if it is not working. You will just need a screwdriver to open and replace it.
Q3. How do I reset my e-bike controller?
Resetting the electric bike controller is so simple. You just need to turn on the ebike and wait for 5-10 seconds and then press the up and down button together for 3 or 4 seconds. This process will easily reset your ebike controller.
In case you have missed it:


If your e-bike lacks power, moves unevenly, or falls short of expected speed, and your LCD screen displays errors, this could point to a faulty controller.